How to Connect Your WhatsApp Business App to the API (Without Getting Banned)
Step-by-step guide to connecting your existing WhatsApp Business App to the Cloud API using Coexistence — keep your app, get the API.
You already use the WhatsApp Business App on your phone to talk to customers. Now you want the Cloud API so you can automate replies, send broadcasts, and connect a CRM — but you're worried about losing your number or getting banned.
Good news: Coexistence lets you keep the Business App running and add the API on the same number. No migration, no downtime, no ban risk — if you follow the steps below.
Before you start — read this
- Make sure your WhatsApp Business App is up to date on your phone.
- Do not use a number that is already registered with another BSP or API provider — disconnect it first.
- Have access to the Facebook account that owns (or will own) the Meta Business Portfolio for your business.
- You will need to verify the number via a message inside the WhatsApp Business App — keep your phone nearby.
Step 1 — Go to Settings > WhatsApp
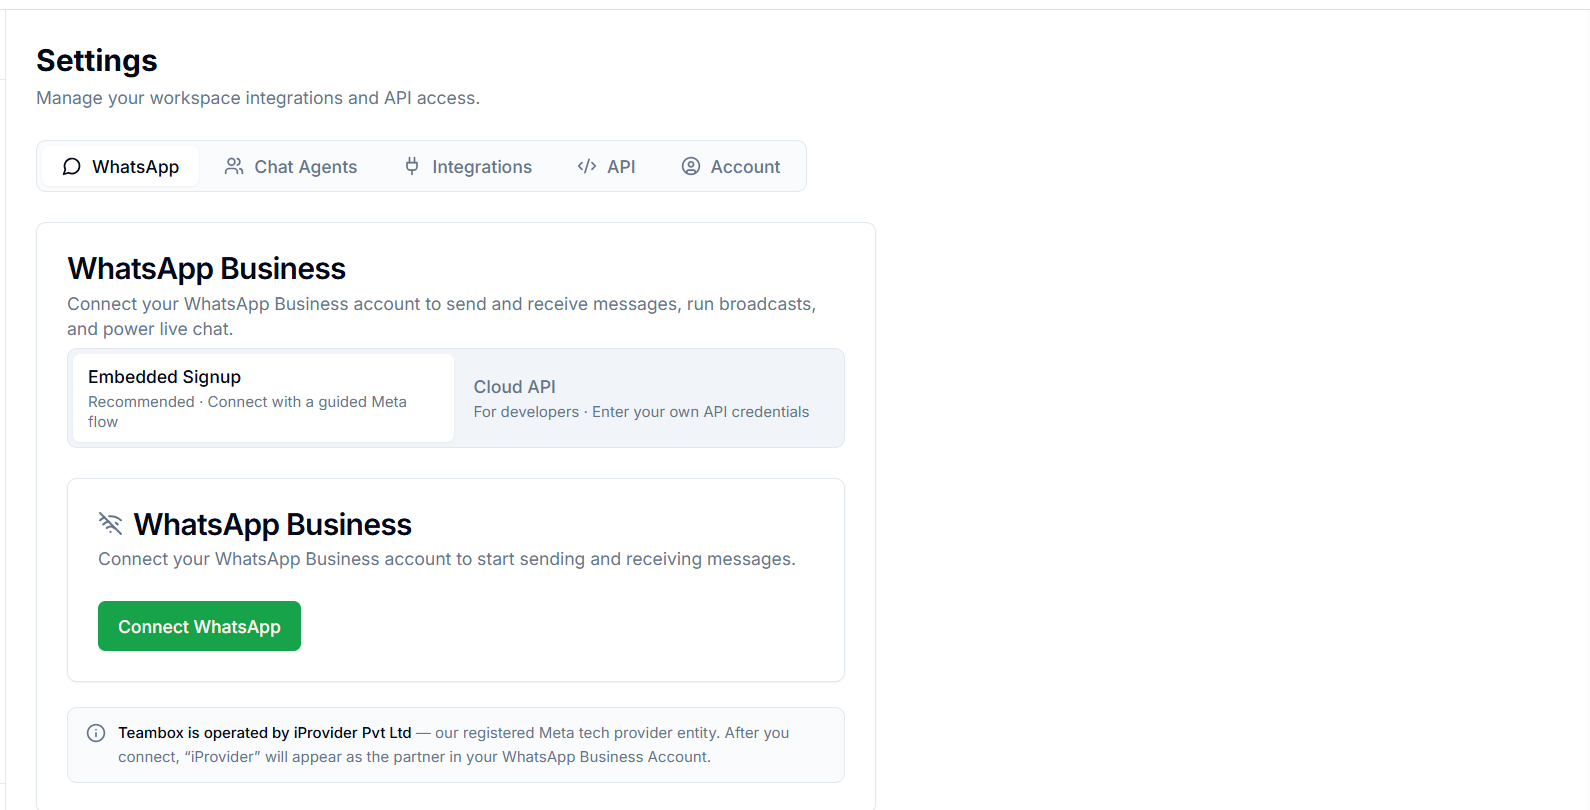
Log in to Teambox and open Settings. Click the WhatsApp tab at the top.
You'll see two connection methods:
- Embedded Signup (Recommended) — a guided Meta flow that opens in a popup. This is the one you want.
- Cloud API — for developers who already have API credentials.
Click the green "Connect WhatsApp" button to start the Embedded Signup flow.
Step 2 — Connect Your Account to iProvider
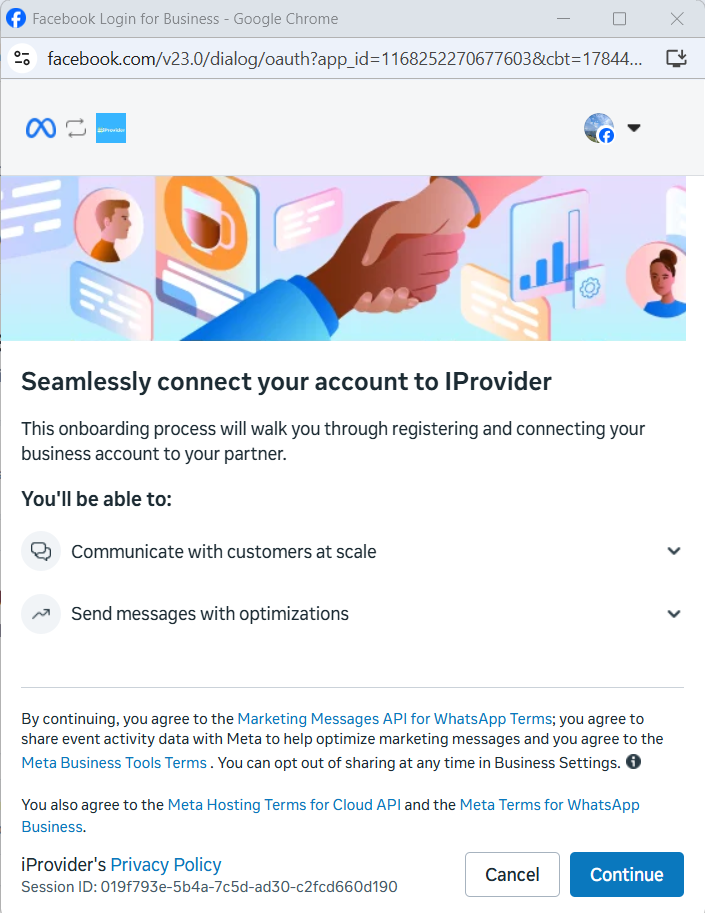
A Meta popup opens. It says "Seamlessly connect your account to IProvider" (iProvider Pvt Ltd is Teambox's registered Meta tech provider).
You'll be able to:
- Communicate with customers at scale
- Send messages with optimizations
Review the terms and click "Continue".
Step 3 — Select "Connect a WhatsApp Business App"
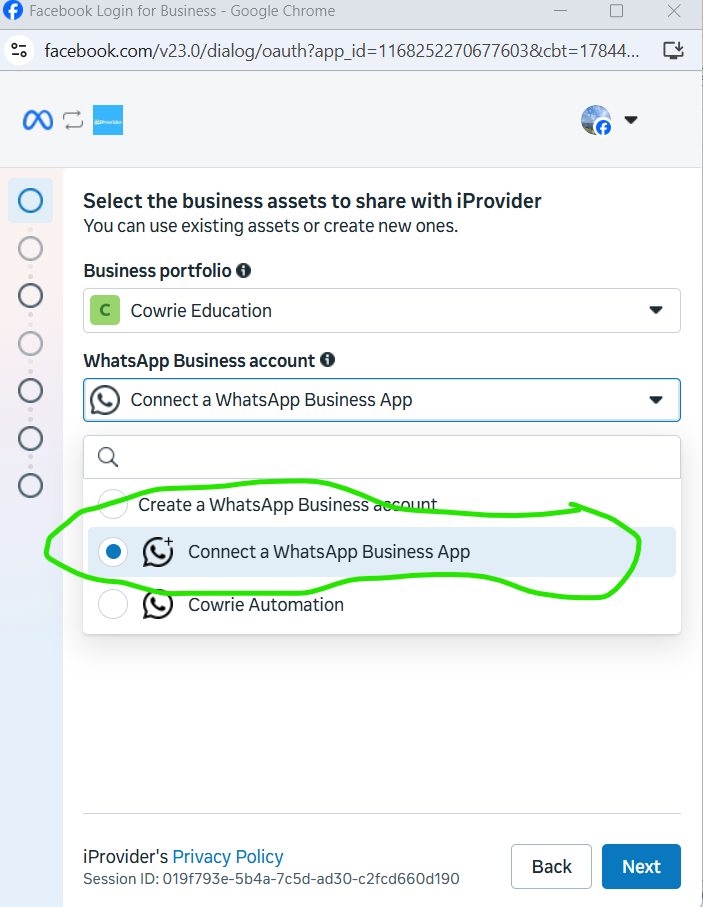
This is the most important step.
On the next screen, you'll see "Select the business assets to share". Under WhatsApp Business account, open the dropdown and choose:
"Connect a WhatsApp Business App"
NOT "Create a WhatsApp Business account" — that creates a new number
Why this matters
If you pick "Create a WhatsApp Business account" instead, Meta will register a new API number — your existing Business App number won't be connected. Pick "Connect a WhatsApp Business App" to link your existing number via Coexistence.
Also select your Business portfolio from the dropdown (this is your Meta Business Suite account). Then click "Next".
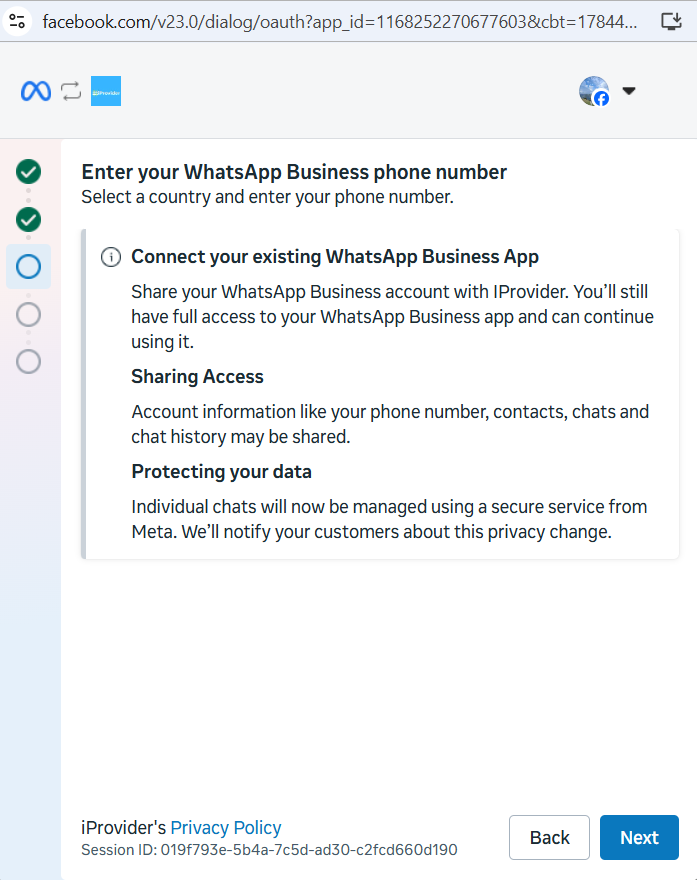
Step 4 — Enter Your Phone Number
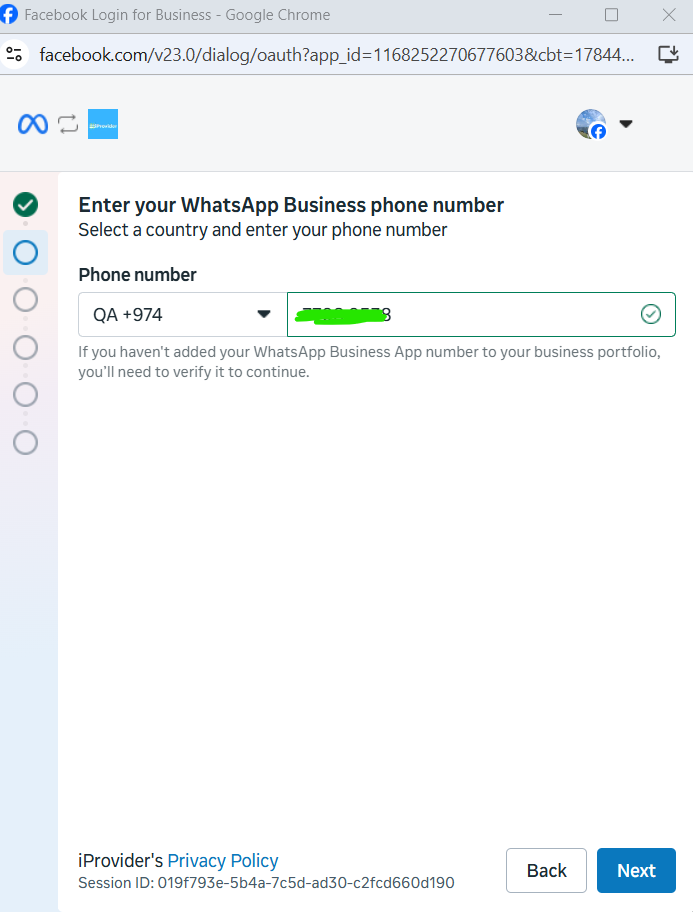
Select your country code and enter the phone number that is currently running the WhatsApp Business App.
Meta will verify this number. If it's already added to your business portfolio, it'll show a green checkmark. If not, you'll need to verify it in the next step.
Click "Next".
Step 5 — Coexistence Confirmation
You'll see a message that says "Connect your existing WhatsApp Business App". This confirms you're using Coexistence mode. It tells you:
- Sharing Access — your account info, contacts, chats, and chat history may be shared with the provider.
- Protecting your data — individual chats will now be managed using a secure service from Meta. Your customers will be notified about this privacy change.
This is normal. You still keep full access to your WhatsApp Business App on your phone. Click "Next".
Step 6 — Import Contacts & Chat History
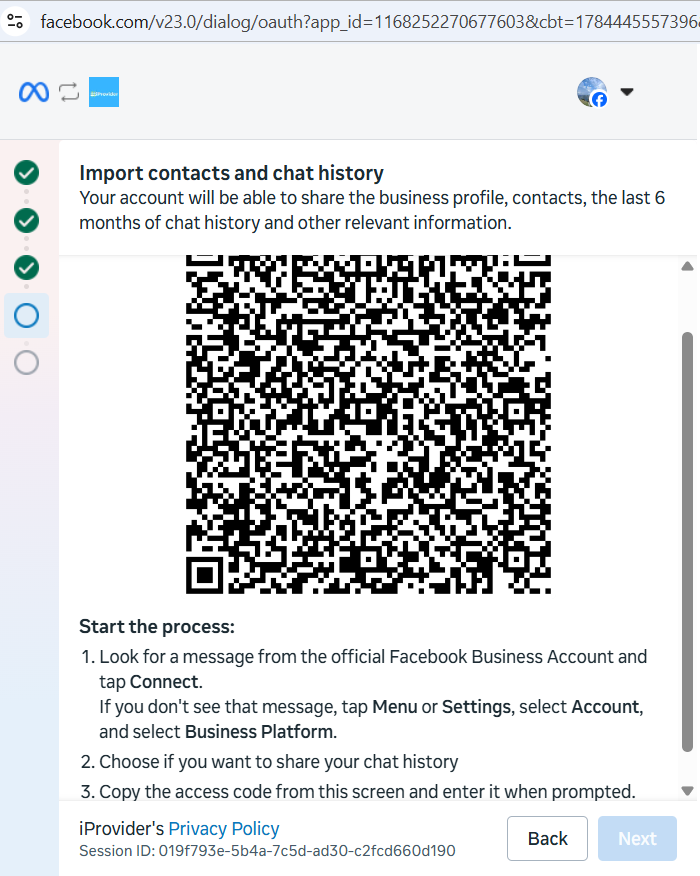
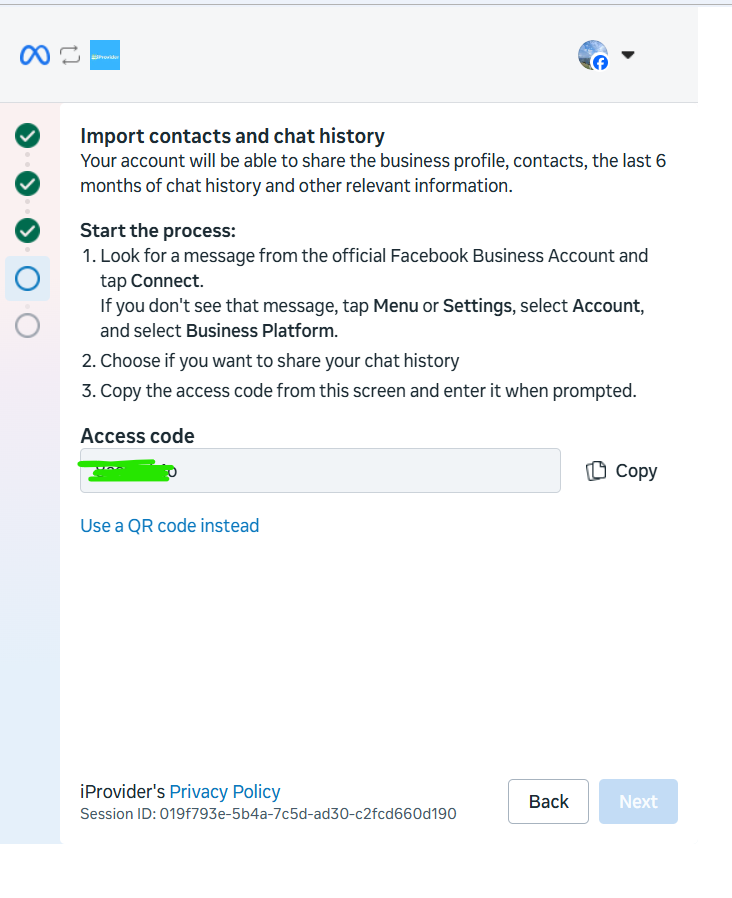
Meta will ask if you want to import your contacts and the last 6 months of chat history. You'll see either:
- A QR code — scan it with your WhatsApp Business App to approve the connection
- An Access code — copy it and enter it in your WhatsApp Business App when prompted
On your phone:
- Look for a message from the official Facebook Business Account and tap Connect.
- If you don't see it, go to Settings → Account → Business Platform.
- Choose if you want to share your chat history.
- Enter the access code when prompted.
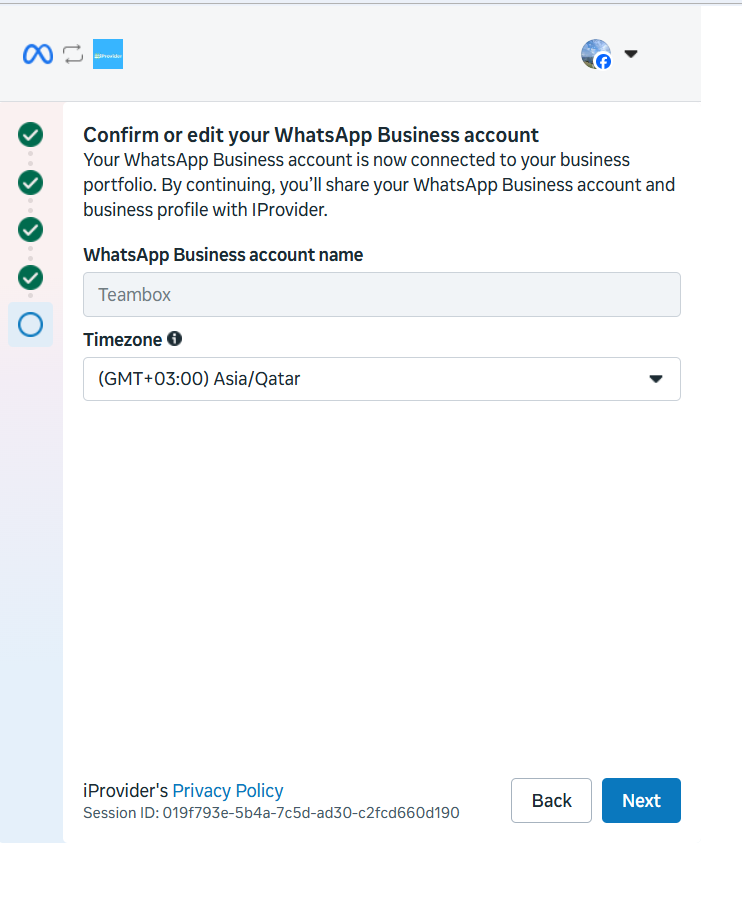
Step 7 — Confirm Your Business Account
Once verified, you'll see "Confirm or edit your WhatsApp Business account". Check that:
- Your Business account name is correct
- Your Timezone is correct
Click "Next".
Step 8 — Done!
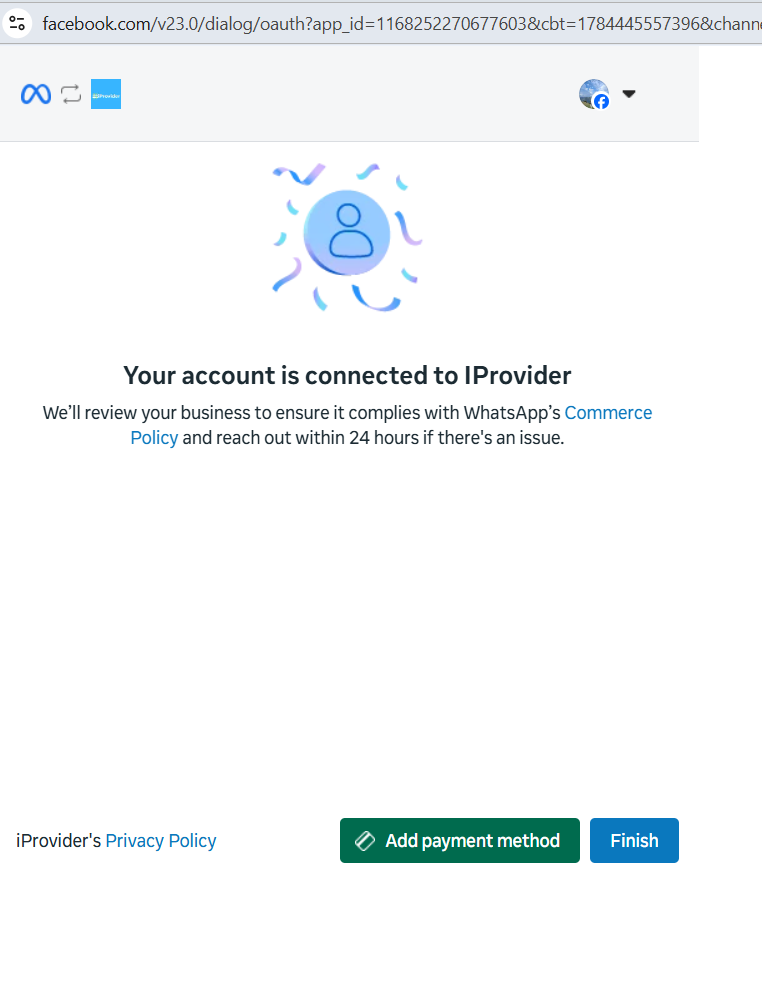
You'll see a success screen: "Your account is connected to IProvider". Meta will review your business to ensure it complies with WhatsApp's Commerce Policy and reach out within 24 hours if there's an issue.
You can optionally add a payment method for your WhatsApp API charges, or click "Finish" to complete the setup.
How to Avoid Getting Banned
Connecting via Coexistence is safe — but here are the rules to follow after you're connected:
Do's
- Use approved templates for business-initiated messages
- Reply to customers within the 24-hour window
- Keep your quality rating green in Meta Business Suite
- Let customers opt in before sending marketing messages
- Use a real business name and profile picture
Don'ts
- Don't send bulk messages without templates
- Don't buy contact lists or message people who didn't opt in
- Don't send more than your tier allows (start with 250/day for new API numbers)
- Don't use the API for spam, scams, or prohibited content
- Don't ignore quality warnings from Meta
What Happens After You Connect?
Once connected, your setup looks like this:
| Feature | Business App (Phone) | Cloud API (Teambox) |
|---|---|---|
| Send & receive messages | Yes | Yes |
| Broadcasts & bulk messages | Limited (256 contacts) | Unlimited (with templates) |
| Chatbot & automation | No | Yes |
| CRM integration | No | Yes |
| Team inbox | No | Yes |
| Same number | Yes | Yes — Coexistence |
Ready to connect? Teambox walks you through the entire setup in under 5 minutes. Start free →
Ready to get started with WhatsApp Business API?
Teambox connects your WhatsApp number to the Cloud API in minutes — no BSP needed. AI replies, team inbox, and calendar booking included.
Related Articles
WhatsApp vs Business App vs Cloud API
The three WhatsApp products explained — plus BSPs, the 2022 Cloud API shift, and Coexistence.
ReadWhatsApp Coexistence — How It Changes the Game
Run the Business App and Cloud API on the same number. Here's how Coexistence works and the do's and don'ts.
ReadWhatsApp API Pricing — How It Actually Works
User-initiated vs business-initiated conversations, template categories, and what each message costs.
ReadWhy WhatsApp Rejected Your Template — And How to Get It Approved
Meta's exact reasons for rejecting WhatsApp message templates, how the review system works, and a checklist to get your next template approved on the first try.
Read